
git reset : add나 rm 명령들을 제거한다.
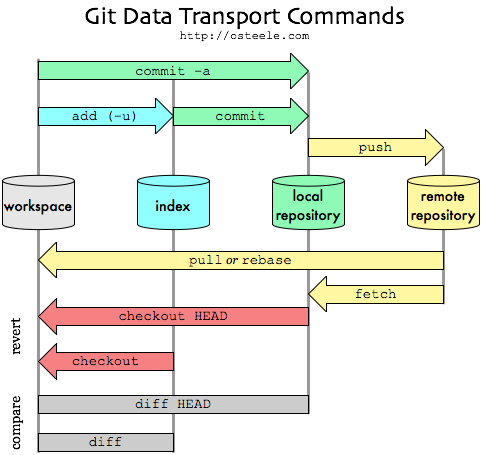
git는 명령어를 사용하면 commit하고, push 하기 전 까지 완전히 적용이 안 된다.
따라서 add/rm 후, commit 하여 local repository에 적용시키고, push하여 remote repository에 까지 업데이트 한다.
1. git add[rm] 파일명
2. git commit -m "메시지"
3. git push origin master
업데이트 된 내용을 받으려면
git pull
하면 된다.
git checkout -- <파일> : 현재 작업 중인 파일 중 수정된 파일을 index에 있는 것으로 원복
git reset --hard : 현재 작업 중이 파일을 모두 원복 시킴
git reset -- <파일명> : add같은 명령어로 인덱싱한 것을 취소함


 이미, 블로그가 다음View 에 가입되어 있는데, 외부 게시판에서 등록하고 싶다면, 새로운 아이디를 만들어야 한다.


댓글 달기